A cramped bathroom doesn’t have to feel like a compromise. With thoughtful design choices and strategic planning, even the smallest powder room can deliver style, function, and that “bigger than it is” feeling. The key lies in understanding how layout, color, storage, and fixtures work together, not chasing trends that don’t fit the footprint. This guide walks through proven <a href="https://homesteadhug.com/reddit-interior-design/”>interior design strategies tailored specifically for tight quarters, from rethinking the floor plan to leveraging light and visual tricks that actually make a difference.
Table of Contents
ToggleKey Takeaways
- Small bathroom interior design thrives on intentional layout choices—prioritize fixture placement and floor plan optimization before selecting colors or materials to maximize every inch.
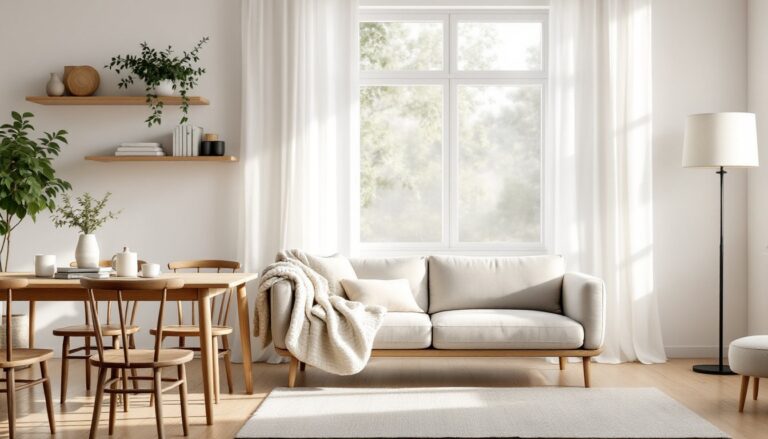
- Light neutrals, monochromatic color schemes, and wall-to-wall mirrors create the illusion of space and are essential strategies for making compact bathrooms feel significantly larger.
- Wall-mounted fixtures, floating vanities, and corner storage solutions eliminate floor clutter while maintaining functionality in bathrooms under 50 square feet.
- Layered lighting with recessed overhead fixtures, task lighting at the mirror, and LED accent strips transform a dim space into one that feels open and welcoming.
- Large-format tiles, consistent flooring across adjacent spaces, and frameless glass shower enclosures reduce visual interruptions that make small bathrooms feel cramped.
- A well-planned small bathroom design that prioritizes function over trends will outperform a larger, poorly organized space every time.
Smart Layout Strategies for Maximizing Limited Square Footage
Before picking paint or tile, assess the floor plan. In bathrooms under 40 square feet, every inch counts, and poor layout kills functionality fast.
Start with the toilet. Building codes (IRC) require at least 15 inches of clearance from the centerline to any wall or obstruction, and 21 inches of clearance in front. If the current placement eats up walkway space, consider relocating it, though this involves moving the waste line and may require a plumber and permit.
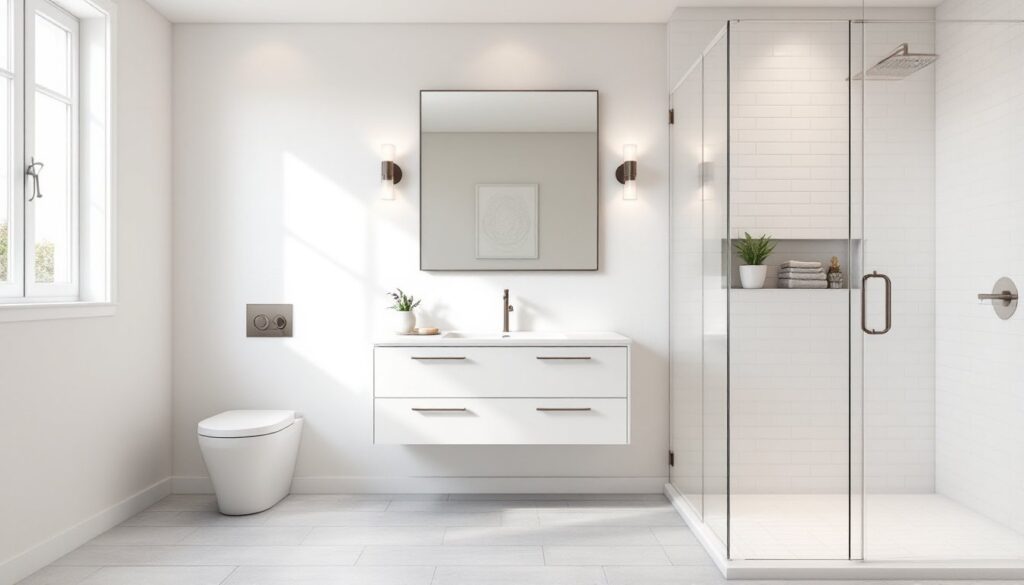
Swap a tub for a walk-in shower. Removing a standard 60-inch tub and installing a 32 x 32-inch or 36 x 36-inch corner shower stall can free up 8 to 12 square feet. Frameless glass enclosures keep sightlines open and make the room feel less boxed in. If a tub is non-negotiable, a Japanese-style soaking tub (shorter but deeper) can work in tight corners.
Consider a pocket door. A hinged door that swings inward claims about 9 square feet of floor area when open. Pocket doors slide into the wall cavity, reclaiming that space. Installation requires opening the wall and installing a track between studs, doable for an intermediate DIYer with a reciprocating saw and basic framing skills, but check for plumbing and electrical runs first.
Wall-mount everything possible. Floating vanities, wall-hung toilets, and corner sinks eliminate floor contact, making the room appear larger and simplifying cleaning. Wall-hung toilets require an in-wall carrier system (like a Geberit frame), which adds cost and complexity but pays dividends in visual space.
Color Palettes That Make Small Bathrooms Feel Larger
Light neutrals remain the safest bet for expanding perceived square footage, but don’t default to builder-grade beige out of fear.
Whites and off-whites reflect the most light. Bright white (pure, cool-toned) works in bathrooms with strong natural light: warm whites (with cream or gray undertones) soften spaces lit primarily by artificial fixtures. One gallon of quality semi-gloss or satin paint covers roughly 350–400 square feet and stands up better to moisture than flat finishes.
Soft grays and greiges add depth without heaviness. Pair them with white trim and bright white ceilings to maintain contrast and keep the eye moving upward. Avoid dark accent walls in bathrooms under 50 square feet, they create a cave effect rather than intimacy.
Monochromatic schemes (one color in varying shades) eliminate visual breaks that chop up space. For example, pairing pale blue walls with slightly darker blue cabinetry and white fixtures creates flow without monotony. This approach also works well for homeowners exploring principles from condo interior design, where cohesive palettes maximize perceived space.
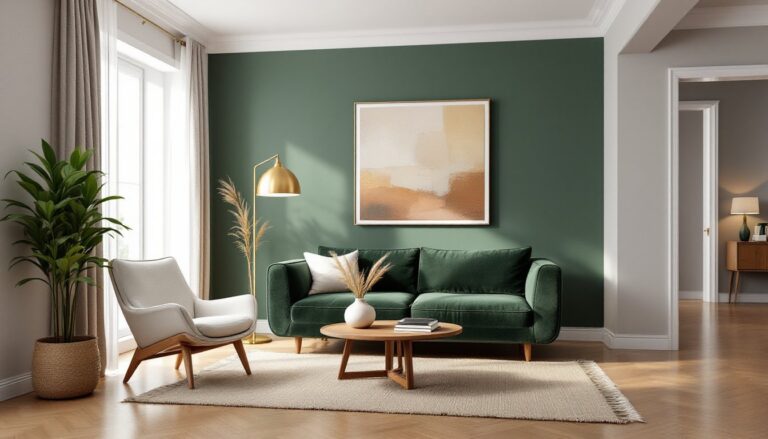
Bold color CAN work, with strategy. Painting all surfaces, including the ceiling, in a single saturated hue (deep navy, forest green, charcoal) erases spatial boundaries and creates a jewel-box effect. This technique works best in windowless powder rooms where natural light isn’t a factor. Pair it with ample task lighting and metallic accents to avoid a dungeon vibe.
Storage Solutions That Don’t Sacrifice Style
Clutter makes small bathrooms feel chaotic. Built-in and vertical storage keeps necessities accessible without crowding counters.
Recessed medicine cabinets sit flush with the wall, using the cavity between studs (typically 14.5 inches wide for 16-inch on-center framing, or 22.5 inches for 24-inch spacing). Installation involves cutting drywall and possibly relocating electrical for integrated lighting. Frameless mirror-front models double as functional mirrors.
Niches in shower walls provide shampoo storage without protruding shelves. Standard niche depth is 3.5 inches (the depth of a 2×4 stud bay). Frame them during the stud phase, waterproof thoroughly, and tile to match. Avoid placing niches on exterior walls in cold climates, they create thermal breaks and potential mold issues.
Floating shelves above the toilet use dead space. Install with heavy-duty brackets anchored into studs or use toggle bolts rated for at least 50 pounds if studs aren’t accessible. Keep shelves shallow (6–8 inches) to avoid head-bumping.
Vanities with drawers beat cabinets. Deep drawers with dividers maximize vertical storage and keep small items organized. A 24-inch vanity with two full-depth drawers stores more usably than a 30-inch cabinet with a single shelf. Soft-close hardware (add about $15–25 per drawer) prevents slamming in tight quarters.
Over-door hooks and towel ladders keep linens off the floor without requiring wall penetration. Ladder-style racks lean against the wall and hold multiple towels in about 2 square feet of floor space.
Choosing the Right Fixtures and Fittings for Compact Bathrooms
Undersized or oversized fixtures throw off proportion and waste space. Manufacturers make compact versions specifically for tight layouts.
Toilets: Round-front bowls project about 25–28 inches from the wall, while elongated bowls extend 29–31 inches. In a narrow bathroom, those 3–4 inches matter. Compact elongated models split the difference at around 28.5 inches. Wall-hung models project even less (around 21–24 inches) but require in-wall carriers as mentioned earlier.
Sinks and vanities: Pedestal sinks offer a small footprint (roughly 20 x 16 inches) but sacrifice all counter and storage space. Corner pedestal sinks fit into otherwise wasted 90-degree angles. Wall-mounted sinks free up floor space but expose plumbing, consider a decorative trap or install supply lines inside the wall. Vanities as narrow as 18 inches are available, though 24 inches is more practical for daily use.
Faucets: Single-hole faucets streamline small vanities. Widespread faucets require three holes (typically spaced 8 inches apart) and crowd compact sinks. Wall-mounted faucets free up deck space entirely but require precise rough-in placement (usually 4–6 inches above the sink rim) and aren’t DIY-friendly for retrofit installations.
Showers: Prefab fiberglass or acrylic stalls start at 32 x 32 inches. Custom tile showers allow flexible dimensions but require waterproofing membranes, slope mortar beds (or prefab pans), and careful tile work, plan on a full weekend and intermediate skills. Curbless showers eliminate the step-over barrier and create seamless floors, though they require precise floor slope (minimum 1/4 inch per foot toward the drain) and sometimes floor joist modifications to accommodate the drain assembly. Design inspiration from platforms like Apartment Therapy often showcases creative compact shower solutions.
Lighting Techniques to Open Up Your Space
Dim, single-source lighting makes any bathroom feel smaller and less functional. Layered lighting adds depth and eliminates shadows.
Overhead lighting: Recessed LED cans (4-inch diameter is common for bathrooms) provide ambient light without hanging fixtures that reduce headroom. Space them roughly 4 feet apart for even coverage. IC-rated housings allow contact with insulation in ceiling cavities. A bathroom under 50 square feet typically needs 2–3 fixtures at 650–800 lumens each.
Task lighting at the mirror: Side-mounting sconces at eye level (roughly 60–65 inches off the floor) eliminates shadows better than a single overhead fixture. For a centered mirror, mount one sconce on each side, 28–36 inches apart. If wall space doesn’t allow sconces, a horizontal LED light bar mounted above the mirror works, choose one at least two-thirds the mirror’s width for balanced illumination.
Accent lighting: LED strip lights under floating vanities or inside niches add depth and a modern touch. Low-voltage strips (12V) are safer in wet locations and easier to install than line-voltage options. Use waterproof-rated strips (IP65 or higher) near showers and tubs.
Dimmers: Installing dimmer switches (compatible with LED bulbs) lets users adjust light levels for different times of day. A Lutron or Leviton LED-compatible dimmer runs $15–30 and installs in about 15 minutes for anyone comfortable with basic electrical work. Turn off the breaker first, always.
Natural light: If the bathroom has a window, keep treatments minimal. Frosted or textured glass provides privacy without blocking light. Top-down/bottom-up shades allow light in while covering the lower half for privacy. Skylights or solar tubes bring natural light into windowless interior bathrooms but require roof penetration and flashing, hire a pro unless you’re experienced with roofing.
Mirrors, Tiles, and Visual Tricks for Creating Depth
Strategic material choices and placement manipulate perception, making the room feel larger than the tape measure says.
Oversized mirrors reflect light and views, doubling the visual space. A mirror spanning the full width of the vanity (or even wall-to-wall) eliminates frames that create visual boundaries. Frameless mirrors mounted with J-channels or adhesive clips keep the look clean. For a budget-conscious approach, large builder-grade mirrors work fine, upgrade with a DIY frame later if desired.
Large-format tiles reduce grout lines, creating a more seamless look. 12 x 24-inch or larger porcelain tiles on floors make the space appear less busy than traditional 4-inch or 6-inch squares. Running floor tiles diagonally elongates the room visually. On walls, subway tiles (3 x 6 inches) laid horizontally widen the space: stacked rather than staggered installation feels more modern and minimizes grout lines.
Consistent flooring throughout adjacent spaces (hallway into bathroom) blurs boundaries. If replacing the floor, consider extending the same tile or luxury vinyl plank (LVP) from the hallway into the bath. LVP is warmer underfoot than ceramic, 100% waterproof, and easier to install (floating click-lock systems need no adhesive).
Vertical tile patterns draw the eye upward. Running wall tiles from floor to ceiling, rather than stopping at a chair rail or wainscot height, emphasizes height over width. Penny tiles or narrow stacked tiles create vertical lines that elongate walls. Examples like this terrazzo and matte tile renovation show how thoughtful material choices transform tight spaces.
Glass and reflective surfaces: Glossy or semi-gloss paint reflects more light than matte. Glass shower doors (instead of opaque curtains or frosted enclosures) maintain sightlines. Metallic fixtures (polished chrome, brushed nickel) add reflective elements without overwhelming the space. For more visual ideas, many designers turn to MyDomaine for styling tips that balance function and aesthetics.
Limit pattern and texture. Busy wallpaper, heavy textures, or multiple tile patterns fragment the space. Stick to one or two materials and let clean lines do the work.
Conclusion
Small bathroom design isn’t about tricks or trends, it’s about making intentional choices that align with how the space will actually be used. Prioritize layout first, then build around it with color, storage, and lighting that work together rather than compete. Most importantly, don’t let square footage dictate quality. A well-planned 35-square-foot bathroom beats a poorly laid-out 60-square-foot one every time.