Planning a room makeover without design drawings is like framing a house without blueprints, you’ll get somewhere, but probably not where you intended. Interior design drawings translate ideas into measurable, buildable plans that prevent costly mistakes and renovation regrets. Whether you’re repositioning a wall, planning built-ins, or just rearranging furniture, these drawings provide a visual roadmap that keeps projects on track. They’re the difference between guessing at sofa placement and knowing exactly where that sectional fits before delivery day.
Table of Contents
ToggleKey Takeaways
- Interior design drawings are scaled technical documents that translate ideas into measurable, buildable plans, preventing costly mistakes and renovation regrets.
- Floor plans and elevation drawings serve distinct purposes—floor plans show spatial layouts and furniture placement, while elevations detail vertical elements like cabinetry heights and fixture positions.
- You can create basic interior design drawings yourself using graph paper and a scale ruler for non-structural projects like furniture arrangements, paint selections, and simple built-ins.
- DIY tools like RoomSketcher and SketchUp Free offer beginner-friendly digital alternatives, though hand-drawn templates work well for straightforward layouts without a learning curve.
- Hire a professional for structural changes, electrical or plumbing relocations, complex millwork, and permit-required work where code compliance and engineering calculations are essential.
What Are Interior Design Drawings?
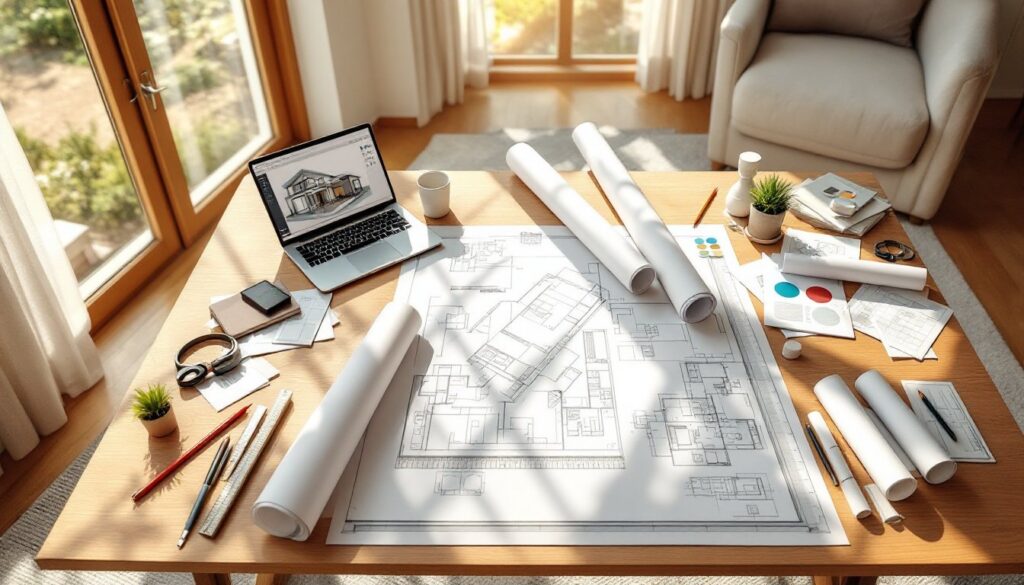
Interior design drawings are scaled visual representations that show how a space will look and function after changes are made. They capture everything from wall locations and door swings to furniture placement and light fixture positions.
These aren’t artistic sketches, they’re technical documents with specific measurements, annotations, and symbols that contractors, electricians, and homeowners can read and execute. A proper design drawing uses scale (typically 1/4 inch = 1 foot for residential work) so every element maintains correct proportions.
Think of them as a communication tool. When you’re explaining your vision to a carpenter or ordering custom cabinetry, a drawing eliminates ambiguity. It answers questions like: How far should the island sit from the counter? Will the bed clear the window trim? Does the sectional block the heating vent?
Most design drawings include dimensions,材料 callouts, and notes about finishes or construction details. They bridge the gap between imagination and installation, turning abstract ideas into actionable plans that keep everyone, from the tile setter to the furniture delivery crew, on the same page.
Types of Interior Design Drawings You Need to Know
Different drawings serve different purposes. You wouldn’t use a floor plan to pick paint colors, and an elevation won’t tell you if the couch fits. Here’s what each type accomplishes.
Floor Plans and Space Layouts
Floor plans are the foundation of any interior project. They’re bird’s-eye views showing the arrangement of rooms, walls, doors, windows, and major fixtures. Drawn to scale, they reveal traffic flow, clearances, and spatial relationships that photos and verbal descriptions can’t convey.
A good floor plan includes:
- Wall dimensions and thickness (typically 4–6 inches for interior partition walls)
- Door and window locations with swing direction noted
- Fixed elements like stairs, plumbing fixtures, and built-in cabinetry
- Furniture placement with clearance zones marked
When planning furniture layouts, floor plans prevent common mistakes like blocking outlets, creating awkward walkways, or buying pieces that won’t fit through doorways. They’re especially useful for open-concept spaces where defining zones (living, dining, workspace) requires intentional placement rather than walls.
For renovation work, floor plans also identify load-bearing walls versus partition walls, critical information if you’re considering removing a wall. Any structural changes require an engineer or architect to verify feasibility and ensure code compliance, but starting with an accurate floor plan streamlines that conversation.
Elevation Drawings and Wall Details
Elevation drawings show walls straight-on, as if you’re standing in the room looking at a single surface. They’re essential for planning vertical elements: cabinetry heights, tile patterns, wainscoting placement, window treatments, and anything mounted or built into a wall.
Elevations include:
- Vertical dimensions from floor to ceiling and between elements
- Material specifications (subway tile to 48 inches, shiplap above, etc.)
- Fixture and outlet heights (standard outlets at 12–18 inches, switches at 48 inches)
- Trim and molding details
These drawings are critical when working with condo design constraints where ceiling heights and structural limitations affect vertical planning. They also guide electricians on exact placement for sconces, pendant lights, and outlets, no more “somewhere around there” guesswork.
For custom work like built-in shelving or a feature wall, elevations communicate design intent to carpenters. They show bracket spacing, shelf depths, and how elements align with doors or windows. If you’re DIYing a board-and-batten accent wall, an elevation drawing ensures consistent spacing and reveals how many boards you’ll actually need before you start cutting.
How to Create Your Own Interior Design Drawings
You don’t need an architecture degree to draft usable interior drawings, just accurate measurements, graph paper (or software), and attention to detail.
Step 1: Measure the Space
Start with a tape measure and notebook. Record:
- Overall room dimensions (length and width)
- Wall-to-wall measurements in multiple spots (rooms aren’t always square)
- Door and window locations, measured from corners
- Door swing direction and width
- Ceiling height
- Locations of outlets, switches, vents, and plumbing fixtures
Double-check measurements. An eighth-inch error on paper becomes a half-inch mistake in a 10-foot wall.
Step 2: Choose Your Scale
For hand-drawn plans, 1/4-inch scale (1/4″ = 1′) works well on standard graph paper. Each square represents one foot. For larger rooms, 1/8-inch scale gives you more area on a single sheet.
Step 3: Draft the Floor Plan
Draw exterior walls first, then add interior partitions, windows, and doors. Mark door swings with arcs. Include permanent fixtures: toilets, tubs, radiators, fireplaces.
Add furniture next. Cut scale templates from graph paper or use a furniture template (available at drafting supply stores) to test arrangements without erasing repeatedly. This approach follows principles used in industrial spaces where layout flexibility matters.
Step 4: Create Elevations as Needed
Sketch one wall at a time. Measure floor-to-ceiling height and any vertical breaks (windows, chair rails, shelving). Note dimensions and materials directly on the drawing.
Step 5: Annotate and Clarify
Label everything. Add notes about materials, finishes, or installation methods. If you’re handing this to a contractor, clarity prevents expensive miscommunication.
Safety note: Wear safety glasses when measuring in unfinished or demo’d spaces, dust and debris are often present.
Best Tools and Software for DIY Interior Design Drawings
The right tool depends on your comfort level with technology and the complexity of your project.
For Beginners: Pen, Paper, and Templates
- Graph paper and a scale ruler cost under $10 and work for straightforward layouts
- Furniture templates (plastic stencils) speed up floor plan iterations
- Pros: No learning curve, tactile, easy to sketch ideas quickly
- Cons: Revisions require redrawing: harder to share digitally
For Digital Newcomers: RoomSketcher and Floorplanner
Both offer free tiers with drag-and-drop interfaces. You input room dimensions, then place walls, windows, and furniture from built-in libraries. They auto-generate 3D views, which helps visualize finished spaces.
- Pros: User-friendly, cloud-based, shareable links
- Cons: Free versions limit exports: less control over custom details
For Serious DIYers: SketchUp Free
SketchUp’s web-based free version handles complex 3D modeling. It’s powerful enough for custom millwork or detailed renovations but has a steeper learning curve.
- Pros: Robust toolset, large component library (windows, fixtures, furniture)
- Cons: Takes time to master: interface can feel overwhelming initially
For Pros (or Aspiring Pros): AutoCAD or Chief Architect
These are industry-standard CAD programs with subscription fees. They produce construction-grade drawings but require significant training.
Most homeowners don’t need this level of detail unless they’re submitting plans for permits. If your project involves structural changes, moving plumbing, or electrical upgrades, consider working with a designer who already has these tools and knows local code requirements.
Many designers leverage professional portfolio tools to showcase their CAD work, which can help you evaluate their skills before hiring.
When to Hire a Professional vs. DIY Your Drawings
DIY drawings work great for non-structural projects: furniture arrangements, paint and finishes, simple built-ins, or cosmetic updates. If you’re moving a bed or planning a gallery wall, you don’t need a licensed professional.
DIY-friendly projects:
- Furniture layout and space planning
- Paint, wallpaper, and finish selections
- Shelving and simple cabinetry installs (no plumbing or electrical)
- Decorative elements like trim, wainscoting, or accent walls
When to call a professional:
- Structural changes: Removing or moving walls, adding beams, altering load paths. These require engineering calculations and permits.
- Electrical or plumbing relocations: Licensed electricians and plumbers ensure code compliance and safety. Your drawings can guide the conversation, but they’ll produce final installation plans.
- Complex millwork or cabinetry: Custom built-ins with integrated lighting, hidden storage, or precision joinery benefit from professional drafting and fabrication.
- Permit-required work: Many jurisdictions require stamped drawings from licensed architects or engineers for structural, electrical, or plumbing changes.
Understanding the difference between interior architecture and design helps clarify when technical expertise becomes necessary. Interior architects handle spatial reconfiguration and structural integration: interior designers focus on finishes, furnishings, and aesthetics.
Even when hiring pros, your DIY drawings provide a valuable starting point. They communicate your vision and preferences, making the design process more collaborative and efficient. Professionals can refine your ideas, add technical details, and ensure everything meets code, but you’ve already done the creative heavy lifting.
Resources like Houzz’s guide to architectural drawings illustrate the progression from concept sketches to construction documents, showing where DIY ends and professional services add value. For ongoing inspiration and current design trends, sites like Homedit and MyDomaine showcase real-world applications of well-planned spaces.
Bottom line: DIY your drawings for cosmetic and furniture-focused projects. Bring in professionals when you’re changing the bones of the house or when permits and code compliance enter the picture. Your safety, your home’s structural integrity, and your local building department all appreciate that distinction.