Interior design drawing bridges the gap between a vague idea and a finished room. Whether you’re planning a kitchen remodel, rearranging furniture, or pitching a renovation to your spouse, a well-executed drawing communicates scale, proportion, and intent better than any Pinterest board. It’s not about artistic talent, it’s about learning a few fundamental techniques that translate three-dimensional spaces onto paper or screen. This guide walks through the tools, methods, and steps needed to create functional design drawings that actually help you build or renovate with confidence.
Table of Contents
ToggleKey Takeaways
- Interior design drawing communicates scale, proportion, and intent more effectively than mood boards, helping you confirm furniture fit, outlet placement, and spatial clearance before construction begins.
- Three main types of drawings serve different purposes: floor plans provide overhead layouts, elevations show wall-on views of vertical elements, and perspective drawings simulate how spaces look from a human vantage point.
- Accurate measurement is essential—use a tape measure or laser distance measurer to collect precise data, then choose appropriate scales (¼” = 1′ for single rooms) to maintain consistency throughout your interior design drawing.
- Both hand-drawn and digital methods have value: quick sketches on graph paper work well for single-room projects, while digital tools like SketchUp or RoomSketcher offer precision and easy revisions for complex renovations.
- Follow the step-by-step process—measure, choose scale, draw walls, add fixed elements, place furniture, annotate clearly, and create elevations for kitchens or bathrooms—to catch design issues on paper and avoid costly mistakes during construction.
What Is Interior Design Drawing and Why Does It Matter?
An interior design drawing is a visual representation of a space, existing or planned, that shows dimensions, layout, furniture placement, and architectural features. Unlike a photograph or a mood board, a drawing provides measurable information. It tells you whether that sectional will actually fit, where electrical outlets need to go, and how much clearance you’ll have around a kitchen island.
There are several types of interior design drawings, each serving a different purpose:
- Floor plans show the bird’s-eye view of a room with walls, doors, windows, and furniture laid out to scale.
- Elevations depict straight-on views of walls, revealing cabinet heights, tile layouts, and built-in details.
- Perspective drawings illustrate how a space will look from a human vantage point, adding depth and realism.
For DIYers and homeowners, these drawings serve as both planning tools and communication aids. If you’re hiring a contractor, electrician, or tile setter, a clear drawing prevents costly misunderstandings. If you’re doing the work yourself, it functions as a blueprint that keeps the project on track. Understanding industrial-style spatial planning or adapting layouts for smaller footprints both start with accurate drawings.
Essential Tools and Materials for Interior Design Drawing
You don’t need an architecture degree or expensive software to start drawing interior spaces. The right tools depend on whether you’re working by hand or digitally, but both approaches require the same core information: accurate measurements and a clear sense of scale.
For hand-drawn plans:
- Graph paper (¼-inch grid is standard) makes it easier to maintain scale without constant calculations.
- Architectural scale ruler lets you work in common scales like ¼” = 1′ or ½” = 1′.
- Mechanical pencil (0.5 mm or 0.7 mm lead) gives clean, consistent lines.
- Eraser and drafting brush for corrections without smudging.
- T-square or parallel bar helps keep horizontal lines true if you’re working on larger sheets.
- Circle template and French curves speed up drawing furniture and fixtures.
For digital drawing:
- SketchUp Free is beginner-friendly and runs in a browser: it’s solid for basic floor plans and 3D visualization.
- RoomSketcher and Floorplanner offer drag-and-drop interfaces tailored to home design.
- Procreate (iPad) or Concepts work well if you prefer stylus-based sketching with digital flexibility.
- AutoCAD LT or Chief Architect are overkill for most DIY projects but useful if you’re tackling multiple rooms or whole-house renovations.
Regardless of medium, invest in a 25-foot tape measure and a laser distance measurer. Accuracy at the measurement stage saves hours of redrawing later. For complex spaces with angled walls or bay windows, a laser measurer cuts down on errors and speeds up data collection significantly.
Understanding Floor Plans and Space Planning Basics
A floor plan is the foundation of any interior design drawing. It’s a scaled, overhead view that shows the layout of walls, doors, windows, and fixed elements like stairs or built-ins. Most residential floor plans use a scale of ¼ inch = 1 foot or ½ inch = 1 foot, depending on the size of the space and the level of detail required.
Start by measuring the room’s perimeter. Note the location and width of doors (standard interior doors are 32 inches wide: exterior doors are typically 36 inches), windows, and any permanent fixtures like radiators or floor vents. Mark wall thicknesses, interior walls are usually framed with 2×4 studs (actual dimension: 1.5″ x 3.5″), while exterior walls often use 2×6 studs (actual: 1.5″ x 5.5″) for insulation.
Once the shell is drawn, add furniture and appliances to scale. A standard queen bed is 60″ x 80″, a sofa averages 84″ long, and a refrigerator is typically 36″ wide. Leave adequate clearance: 36 inches minimum for main walkways, 42 inches in kitchens for appliance doors to open comfortably.
Space planning for condo layouts often requires creative furniture arrangement due to tighter square footage. Use your floor plan to test multiple configurations before moving heavy pieces. Drawing allows you to explore options like floating furniture away from walls or creating zones within an open layout without the physical labor of trial and error.
Creating Elevation and Perspective Drawings for Your Home
Elevation drawings show walls head-on, as if you’re standing directly in front of them. They’re essential for planning built-ins, tile patterns, wainscoting, or any vertical design element. Unlike floor plans, elevations reveal height relationships, cabinet stacks, window trim, chair rails, and crown molding all become visible.
To create an elevation, measure wall height (most residential ceilings are 8 feet, though newer builds may be 9 feet or 10 feet). Mark the positions of windows, doors, outlets, and switches at their actual heights. Standard electrical outlets sit 12 to 16 inches above the floor: light switches are typically 48 inches high. If you’re planning a kitchen, base cabinets are 34.5 inches tall (36 inches with countertop), and upper cabinets usually start 18 inches above the counter.
Perspective drawings add realism by simulating how the human eye sees a room. One-point perspective works well for small spaces or symmetrical layouts, imagine looking straight down a hallway. Two-point perspective suits larger or irregularly shaped rooms and provides a more dynamic view. These drawings take more time but help clients, contractors, or skeptical family members visualize the finished result.
Many designers use platforms like Houzz to gather reference images before attempting perspective sketches. Studying professionally rendered spaces helps beginners understand how lines converge and how objects diminish in size with distance. Freehand perspective takes practice, but digital tools like SketchUp automate much of the geometry while still allowing creative input.
Digital vs. Hand-Drawn: Choosing the Right Approach for Your Project
Both hand-drawn and digital methods have their place in the DIY toolkit. Hand drawing is immediate, requires no learning curve beyond basic drafting skills, and works anywhere, no battery, no software updates. It’s ideal for quick sketches during a hardware store run or brainstorming sessions at the kitchen table. Graph paper and a pencil let you iterate fast without the friction of learning an interface.
Digital drawing excels at precision, revision, and sharing. Once a floor plan is digitized, changing wall colors, swapping furniture, or experimenting with lighting is a matter of clicks. Digital files are easy to email to contractors, print at multiple scales, or overlay with photos for client presentations. Software also automates tedious tasks, calculating square footage, generating cut lists, or rendering 3D views from 2D plans.
For small projects (a single room refresh, furniture rearrangement), hand-drawn plans are often faster and sufficient. For renovations involving multiple trades, electricians, plumbers, tile installers, digital drawings provide the clarity and reproducibility that professionals expect. Many designers create a portfolio using both methods: platforms like homify showcase a mix of hand sketches and polished digital renderings.
If you’re new to interior design drawing, start on paper to understand scale and proportion. Once those fundamentals click, transition to software for projects that need exact measurements or multiple iterations. Hybrid workflows, sketch by hand, scan, then trace and refine digitally, combine the strengths of both approaches.
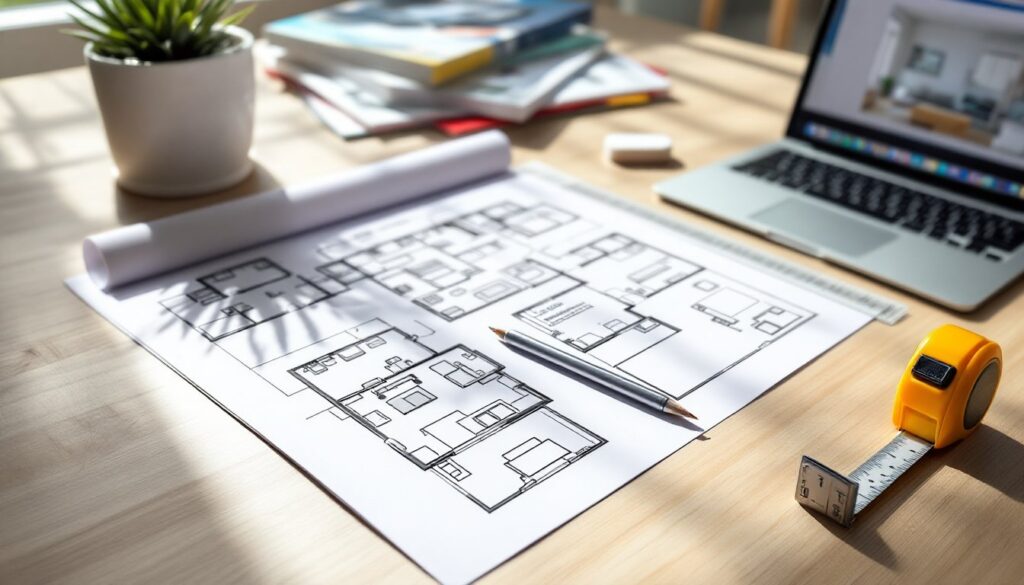
Step-by-Step: Drawing Your First Room Design
Step 1: Measure the space. Use a tape measure or laser measurer to record the length and width of the room, ceiling height, and locations of doors, windows, outlets, and switches. Sketch a rough outline with dimensions as you go, this field sketch doesn’t need to be to scale yet.
Step 2: Choose your scale. For most single rooms, ¼ inch = 1 foot works well on standard 8.5″ x 11″ graph paper or 11″ x 17″ if you want more detail. Larger homes or multi-room plans may require ⅛ inch = 1 foot.
Step 3: Draw the walls. On graph paper or in your software, outline the room’s perimeter to scale. Mark wall thicknesses if you’re planning structural changes or need to show how a built-in fits within the framing. Include door swings (use an arc to show the path) and window sills.
Step 4: Add fixed elements. Draw in permanent features: stairs, closets, radiators, built-in shelving, fireplace hearths. These anchor the layout and constrain furniture placement.
Step 5: Place furniture and appliances. Cut out scaled templates (either paper cutouts or digital symbols) for sofas, beds, tables, and appliances. Move them around the plan to test circulation and function. Maintain clearances: 30 to 36 inches for walkways, 24 inches minimum between a coffee table and sofa.
Step 6: Annotate and review. Label rooms, note dimensions, and call out special features (“tile to ceiling,” “pendant light here,” “outlet for TV”). Developing a strong design portfolio starts with clear, well-annotated drawings that communicate intent.
Step 7: Create elevations (optional but recommended). Pick one or two key walls and draw them straight-on to show cabinetry, tile, or built-in details. This step is especially valuable for kitchens and bathrooms where vertical design matters.
Step 8: Sketch a perspective view (optional). If you want to visualize the finished space, create a simple one-point or two-point perspective. This helps you (and anyone reviewing the plan) see how the room will feel, not just how it measures. Resources like MyDomaine offer visual examples of rendered interior perspectives that can guide your sketching technique.
Once the drawing is complete, walk through it mentally. Can you open the closet door without hitting the bed? Is there enough counter space on both sides of the cooktop? Does the traffic flow make sense? Catching issues on paper saves money, time, and frustration during the build.
Conclusion
Interior design drawing transforms abstract ideas into measurable plans. Whether sketching on graph paper or modeling in software, the goal is the same: communicate dimensions, layout, and design intent clearly enough to guide real-world construction or renovation. Master the basics, accurate measurement, consistent scale, and thoughtful space planning, and you’ll approach every project with greater confidence and fewer costly mistakes.